
Remote connection
We offer remote computer laptop repair support mainly for our returning customers. No engineer is required to visit your home or business. We use your existing Internet connection to connect to your computer. Payment for this service is pre-paid and your card is processed through PayPal. We use the very high secured program TeamViewer to connect to your computer.
TeamViewer is compatible with Microsoft Windows, Mac OS X, iOS and Android.
If you don’t have TeamViewer already installed on your device follow 5 simple steps to download, install, run and set up remote connection with out IT engineer.
Step 1 – Make your £40 pre-payment
Payment for this service is pre-paid and your card is processed through Pay Pal. If we will be unable to fix your problem you will get full refund within 30 minutes. Please use button below to make your money transfer.
Step 2 – Download TeamViewer
Click ‘Download TeamViewer’ button below and save the installation file to a desired location on your computer. If you are using operating system different then Windows go to www.teamviewer.com and select version suitable for you.
Download TeamViewerStep 3 – Open installation file
After the file has finished downloading, open the file to execute setup.
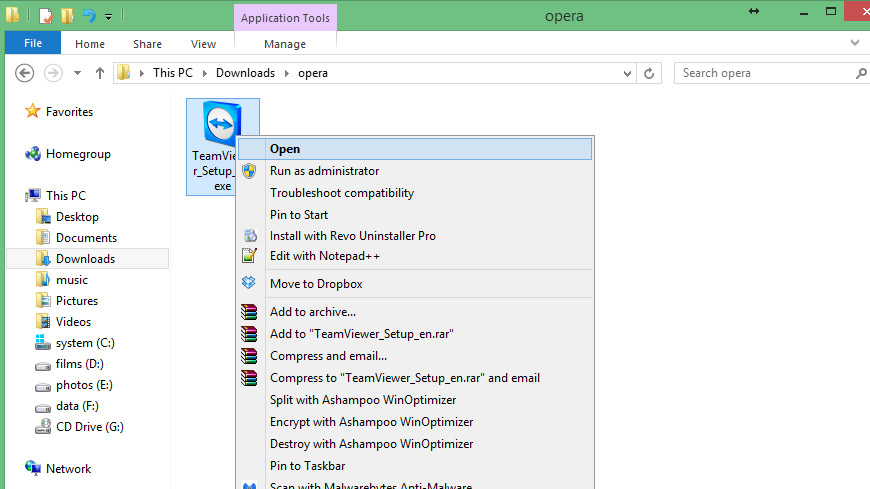
Step 3 – Open installation file
Step 4 – Go through installation process
Leave default settings – Basic installation, Personal, Non-commercial use and click Accept – Finish.
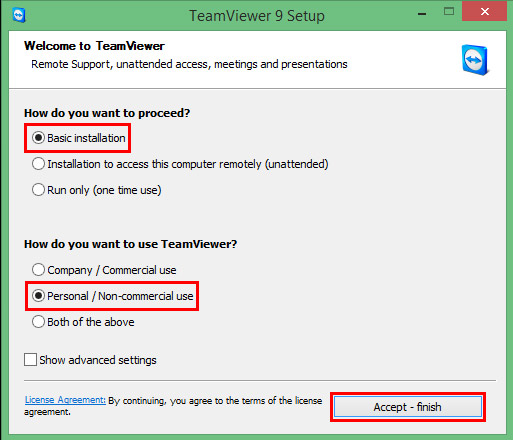
Step 4 – Go through installation process
Step 5 – Provide ‘Your ID’ and ‘Password’ to our engineer
Program should run automatically after installation is completed. Call or text on 0791 000 3344 and provide ‘Your ID’ and ‘Password’ to our engineer. It allows us to service your machine or troubleshoot your problem as if we’re sat right next to you. The repairs can usually be done with no participation on your part, but if you pay attention, you could learn to fix it yourself in the future.
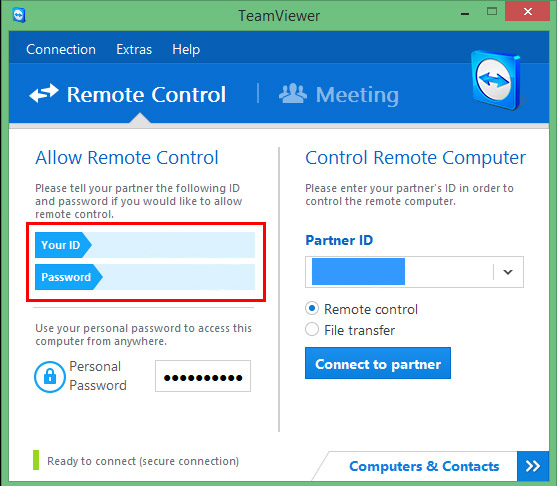
Step 5 – Provide ‘Your ID’ and ‘Password’
